
The Aeropress is one of the most beloved brewing tools among home coffee fans — and for good reason. It’s compact, quick, and produces a cup that’s both clean and flavourful. But what makes it stand out most is versatility: this single device can brew everything from a bold espresso-like shot to a light, filter-style drink, depending on how you use it.
In this guide, you’ll learn how to master both the standard and inverted methods, understand the best grind size and ratios, and discover ways to customize your brew to suit your taste — whether you’re brewing at home, at the office, or on the road.
What Is an Aeropress?
The Aeropress was created in 2005 by Alan Adler, an American engineer who wanted to make better coffee with less bitterness. The result was a durable, plastic brewer that looks a bit like a giant syringe. It uses air pressure to force water through coffee grounds and a paper or metal filter, extracting a strong and clean cup in under 2 minutes.
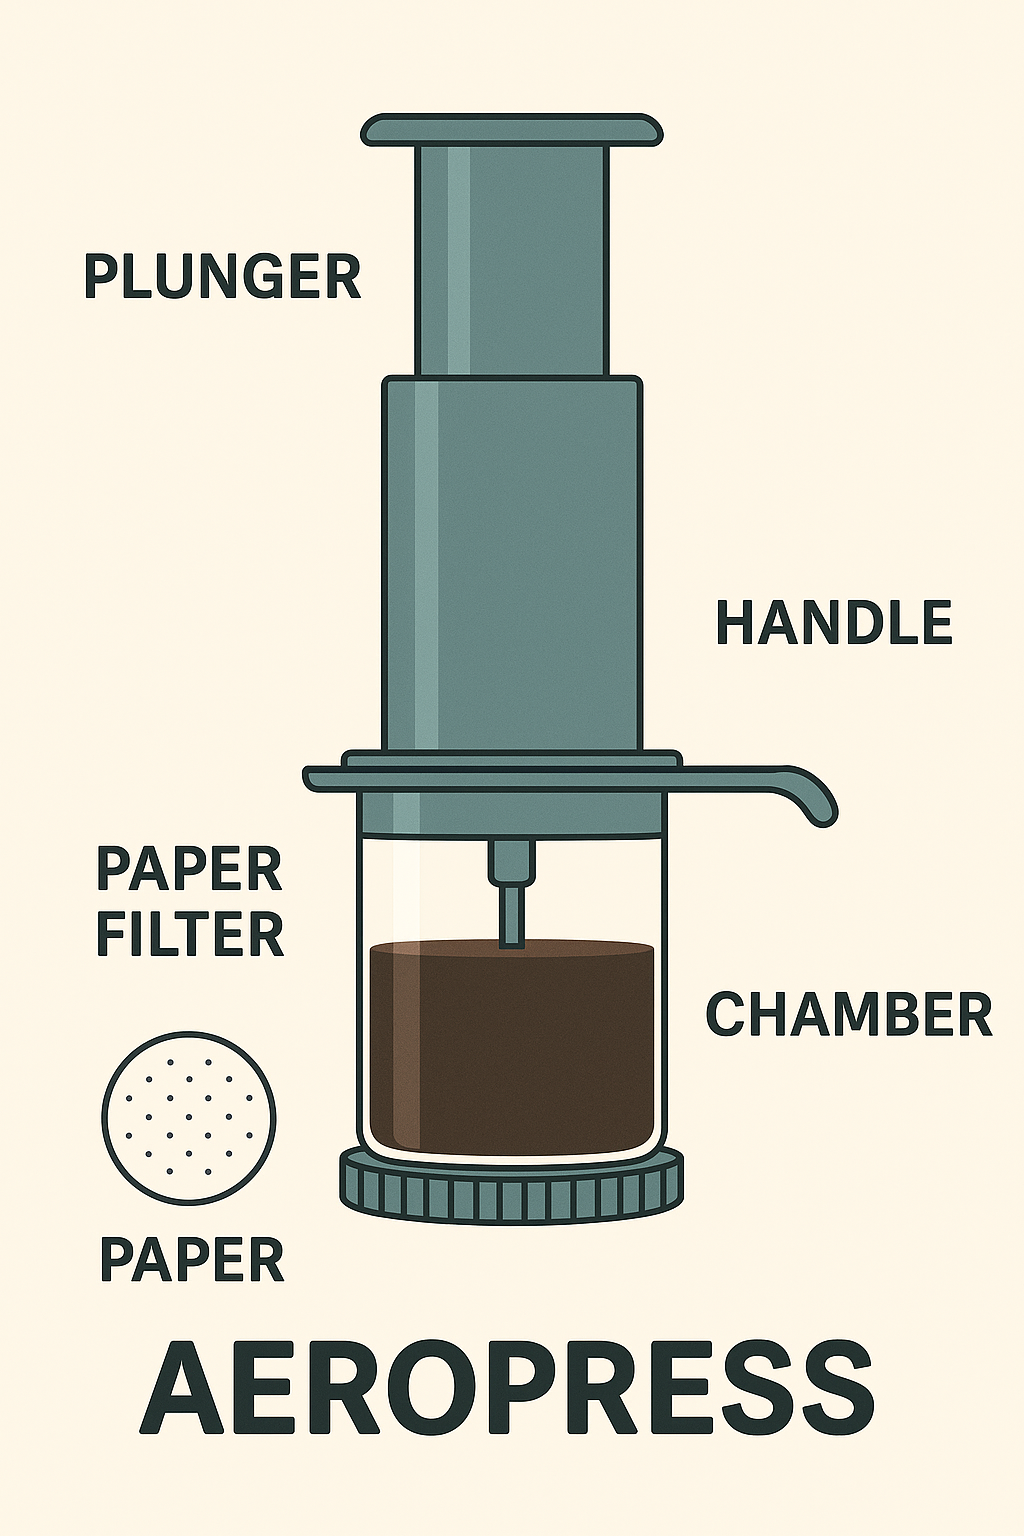
Its main parts are:
- A brewing chamber
- A plunger
- A filter cap
- Paper or reusable filters
Unlike bulky machines or delicate pour-over gear, the Aeropress is lightweight, practically unbreakable, and requires no electricity — making it perfect for travel and daily use alike.
Why Choose an Aeropress?
- ⏱️ Fast brew time (1–2 minutes)
- 💧 Less bitterness than French press or Moka pot
- 🧼 Simple cleanup — just eject the grounds and rinse
- ✈️ Ideal for travel — no power needed, super light
- 🌱 Highly versatile — makes espresso-style and filter-style coffee
It’s especially great for those brewing for one person or looking for an easy-to-control method that still allows for precision.
Method 1: Standard Aeropress (Clean & Balanced)
This method is the official technique suggested by the Aeropress team. It delivers a well-balanced cup with clarity and a light to medium body.
You’ll need:
- 14–17g coffee (medium-fine grind, like table salt)
- 220ml water at 85–90°C
- Timer, kettle, stirrer, and scale
Steps:
- Insert a paper filter into the cap and rinse it with hot water.
- Attach the cap to the brew chamber and place it over your mug.
- Add ground coffee to the chamber.
- Start the timer and pour in all the water within 10 seconds.
- Stir gently for 10 seconds.
- Insert the plunger and press slowly for 30–45 seconds.
- Stop just before you hear the hiss.
Result: Bright, clean flavours and less sediment than a French press. Ideal for light or medium roasts.
Method 2: Inverted Aeropress (Strong & Full-Bodied)
The inverted method involves flipping the Aeropress upside down so the plunger is on the bottom during steeping. This gives you more control and a longer brew time before any dripping begins.
You’ll need:
Same as above, but bump coffee up to 18–20g for a richer brew.
Steps:
- Insert plunger about 1cm into the brew chamber and flip upside down.
- Add coffee and water, stir gently.
- Steep for 60–90 seconds.
- Rinse a paper filter in the cap and attach it.
- Flip carefully onto your cup.
- Press steadily for 20–40 seconds.
Result: Heavier body, bolder flavour — excellent for dark roasts or when you want more kick.
Brew Ratios & Grind Size
Here are general brew ratios you can experiment with:
| Strength | Coffee (g) | Water (ml) | Grind |
|---|---|---|---|
| Light & Clean | 14 | 220 | Medium-fine |
| Standard Everyday | 16 | 200 | Fine |
| Bold & Syrupy | 18–20 | 180 | Fine (like flour) |
Note: Too fine = hard to press. Too coarse = weak or sour. Start medium-fine and adjust based on resistance and taste.
Want better grind control? Check out: Best Manual Coffee Grinders in the UK
Water Temperature & Quality
- Use water between 85°C and 90°C. Boil and let sit for 30 seconds.
- Filtered water improves taste and extraction.
- Too hot = bitter. Too cold = under-extracted or sour.
Pressure & Plunge Technique
The ideal press takes 20–30 seconds.
- Pressing too fast can increase bitterness.
- Struggling to press? Go coarser or reduce your coffee dose.
- Press too easily? Try finer grind or more coffee.
- Stop just before the hiss — don’t force it.
Cleaning & Maintenance
- Eject the puck as soon as you’re done.
- Rinse the rubber seal and chamber with hot water.
- Clean with mild soap every 7–10 brews.
- Dry completely before reassembling.
For deeper cleaning tips, read: How to Clean Your Coffee Gear Without Ruining It
Advanced Recipes & Variations
Once you’ve nailed the basics, try:
- Bypass method: Brew a strong shot, then dilute with hot water for an Americano-style drink.
- Cold brew Aeropress: Use cold water, steep for 2–3 minutes, press over ice.
- Metal filters: Allow more oils through, creating richer body.
You can also experiment with bloom times, stir techniques, and even reverse plunging for clarity.
Common Mistakes to Avoid
- Using stale or pre-ground coffee
- Brewing with boiling water
- Pressing too fast or too forcefully
- Skipping the filter rinse
- Not stirring or steeping long enough
Final Thoughts
The Aeropress rewards creativity. It’s approachable enough for beginners but nuanced enough for pros. Whether you want a quick morning cup or a weekend experiment, this humble device deserves a spot in your kitchen.
Need help deciding between brew methods? Read: French Press vs Moka Pot: Which Suits You Best?