How to Use a Moka Pot (Without Ruining Your Coffee)
A complete guide to mastering stovetop brewing at home
The humble Moka pot — sleek, iconic, and sitting in thousands of kitchen cupboards across the UK — is often misunderstood. Invented in Italy nearly a century ago, it promises espresso-like richness without a machine. But for many first-timers, the result is either bitter, burnt, or barely drinkable.
Sound familiar?
You’re not alone. Brewing great coffee with a Moka pot isn’t hard — but most guides skip the small details that make a big difference. This article is your no-fluff, beginner-friendly roadmap to making consistently bold, delicious stovetop coffee at home — with no guesswork, no fancy gear, and no burnt beans.
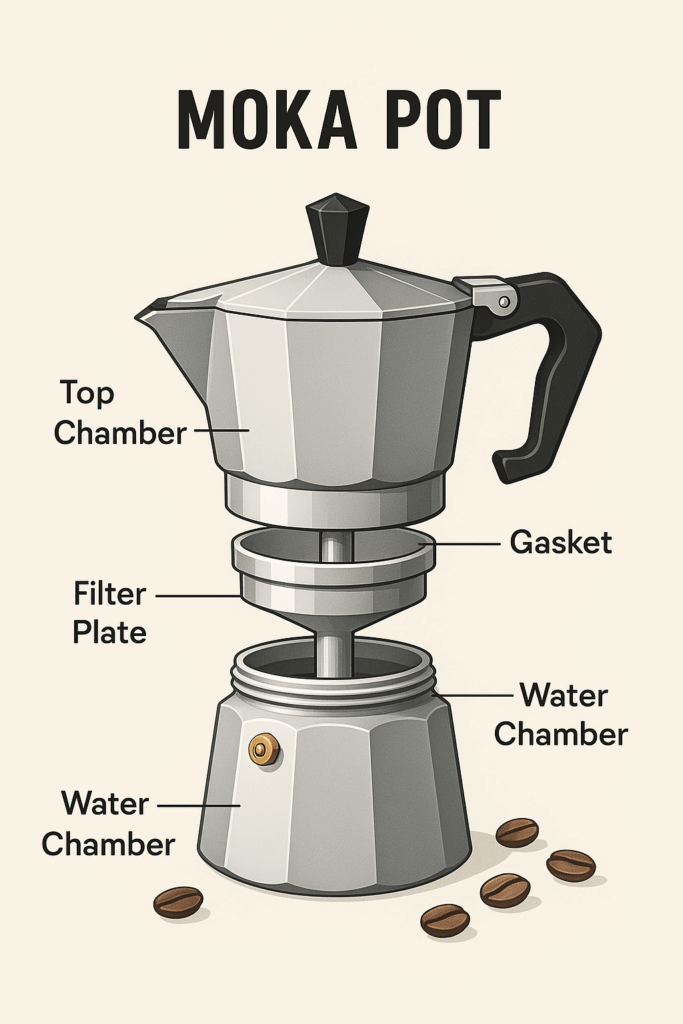
🧠 What Is a Moka Pot?
Also known as a stovetop espresso maker, the Moka pot works by forcing pressurised steam from boiling water through coffee grounds, collecting brewed coffee in an upper chamber.
It’s compact, affordable, and — when used correctly — capable of producing a rich, concentrated coffee that can be enjoyed straight or as the base for drinks like flat whites and lattes.
Each step here is important — rushing or skipping any one of them is what usually leads to poor results.
1. Fill the Bottom Chamber with Hot Water
Start by filling the base of the Moka pot just below the safety valve with hot water (around 75°C) — not boiling. This preheats the pot and speeds up brewing, reducing bitterness.
Don’t use cold water unless you enjoy scorched grounds and metallic flavours.
2. Add Medium-Fine Ground Coffee to the Basket
Grind your beans to a texture slightly finer than table salt. Fill the basket level, without tamping. Just gently level it off with your finger or a spoon.
Screw the pot together gently but firmly. Place it on medium-low heat with the lid open so you can observe the brew.
Keep the handle away from the flame if using gas.
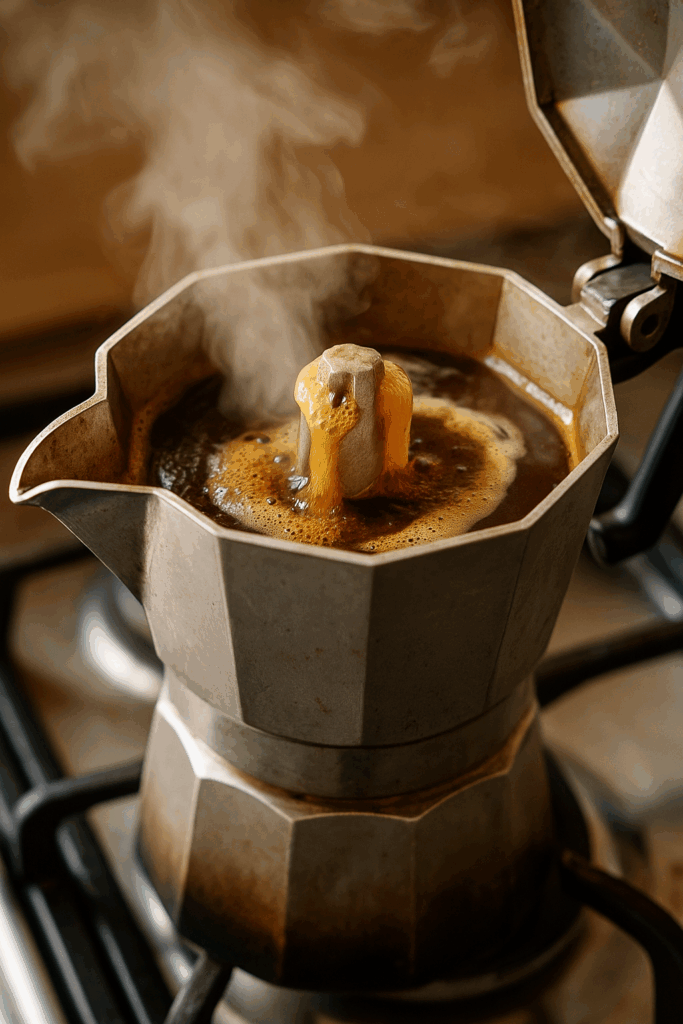
4. Watch the Brew — Then Remove Immediately
Coffee will begin to rise slowly into the upper chamber with a quiet hiss. Once you hear a bubbling or gurgling sound, immediately remove it from the heat — this means it’s finished.
Letting it go beyond this point results in over-extraction and bitterness.
5. Cool the Base (Optional but Ideal)
To instantly stop the brewing process, you can run the bottom chamber under cool water. This prevents heat from continuing to extract bitter flavours.
6. Serve and Enjoy
Pour into a small cup and enjoy straight, or dilute with hot water for a smooth americano, or add steamed milk for a homemade flat white.
The Moka pot is a timeless tool — affordable, reliable, and capable of producing rich, bold coffee when treated with care. The key is patience, control, and understanding the variables: water temp, grind size, and timing.
Once dialled in, it becomes a staple in any home brew setup.